A Step-by-Step Guide to Remove a Water Softener Salt Bridge
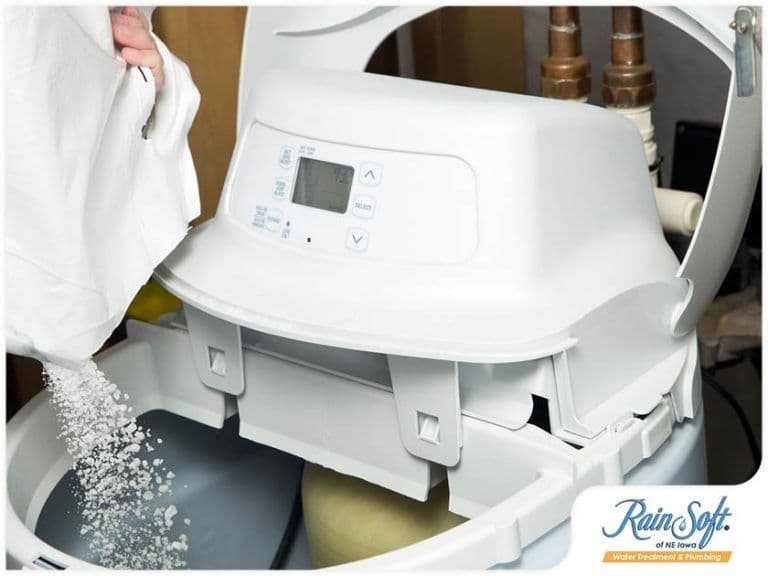
If you use a water softener system on your home’s water supply to soften the water, experts strongly recommend that you first check its salt level. This is because if you use a water softener with a wrong salt level on your water supply, chances are a salt bridge may form on the tank, and an over-crusting of the salt layer could cause problems for you. Luckily, removing a water softener salt bridge can easily be done with the right steps.
Step #1: Turn Off the Water, and Break the Crust
When trying to remove the water softener salt bridge, you’ll want to stop the source first so the salt bridge won’t continue to form. With that in mind, be sure to turn off the water to the softener first either at the incoming faucet or by using the bypass valve at your home. Afterwards, take a long-handed tool like a broom or mop, and tap the salt bridge with the handle until the crust is broken.
Step #2: Remove the Loose Pellets, and Hammer the Edges
Once you’ve broken the water softener salt bridge, scoop out the loose pellets from the top of the tank with a plastic container, and lightly hammer at the salt crust’s edges. While you’re doing it, however, make sure that you avoid hammering the sides of the tank to prevent damaging it and causing leaks in your home.
Step #3: Vacuum Out the Water, and Turn Back on the Water
Once you’ve hammered the salt crust’s edges, remove the small salt chunks again with a plastic container. Then, drain the water in the bottom of the water softener with a wet/dry vacuum. Afterwards, turn the water on again, and follow the softener’s instructions to regenerate them. Once you’ve done so, refill the brine tank with salt. If you follow these instructions to the letter, then your salt bridge problem should be solved immediately.
Looking for someone who can assist you in maintaining your home’s plumbing? Don’t hesitate to turn to RainSoft of NE Iowa. Give us a call at (319) 346-3286, or fill out our contact form to get a quote and schedule a free water test today!
Filed Under: Plumbing Tagged With: Plumbing, Water Purifier, Water Softener
FREE WATER QUALITY TEST
Receive a $40 Gift Card with Your Completed Test
Recent Posts
Hard water, characterized by a high concentration of minerals like calcium and magnesium, is a common issue for many homeowners...
Ensuring clean drinking water is essential for health, but certain chemical contaminants can sometimes find their way into water sources...
Despite the advancements in our municipal water treatment facilities, the risk from contaminants — ranging from industrial pollutants to natural occurrences — is and will always be present...
Contact RainSoft of NE Iowa
For more information and to schedule a complimentary water test, contact RainSoft of NE Iowa today. We are an authorized RainSoft dealer serving Waterloo, Cedar Falls, Cedar Rapids, Marion and many other communities in the northeast region of IA.
Our Testimonials
We live a considerable distance away from the city where Rain Soft is located but have never had any problems with the system itself. We were proud to recommend it to our son when he brought the place from us. He has no problems as of this date. Thank you for your service!
Rainsoft is a great product that comes with great service. We feel it was an investment, but we feel it was worth it. We have the Ultrefiner Drinking Water System that we use for all of of water bottles on the go - they stay clean - no yellow or pink film…. The Water Conditioning System is efficient and we used about 6 bags of salt in the last year - active family of 2 with family stopping in. Would highly recommend Rainsoft.
We have been with Rain soft since 1999. We recently purchased a new softener and decided to stay with Rain soft because of their excellent service and quality of product. We have had the reverse osmosis system since the beginning and have also added the chlorine removal tank. We enjoy having the quality water that our system provides us with. Thanks to rain soft. Brent and Carla Whitlock.
Will make this short. Had some problem with our water softener. Had water on the floor. It would make all kinds of noise and the our water softness was inconsistent. Lucas came and took the time to fix it right! Our water softener has never worked this well. Be sure to let Lucas know much we appreciated his work!!
RainSoft has delivered excellent service and products since we installed a whole house water system more than 20 years ago. We recently replaced our refrigerator and RainSoft came the next day to connect the new water line for our ice/water. Prompt and friendly service!
Blake was awesome and the warranty on the products is very good. Blake took the time to replace all potential problem parts in the system at no additional charge. Living in the country with well water is hard on the system but I don’t know what I would do without it. Blake also had some extra bags of salt on hand to save us a trip. Very professional and obviously took pride in doing things right!


Lifetime Warranty
A RainSoft home water treatment system is backed by the most comprehensive warranty in the industry: the RainSoft Lifetime Warranty. When installed by our knowledgeable, certified technicians and licensed plumbers, you get unsurpassed warranty coverage for all RainSoft water softener and air treatment products. You can even take your RainSoft system with you if you move! That means a water treatment system from RainSoft is the last system you will ever need to buy. Contact us today to schedule a free water test.
News and Updates
Hard water, characterized by a high concentration of minerals like calcium and magnesium, is a common issue for many homeowners...
Ensuring clean drinking water is essential for health, but certain chemical contaminants can sometimes find their way into water sources...
Despite the advancements in our municipal water treatment facilities, the risk from contaminants — ranging from industrial pollutants to natural occurrences — is and will always be present...
We Could Be In Your Area

Mon - Fri: 8AM - 4:30PM
Sat - Sun: Closed


